info@readydrains.com.au
03 9869 3299
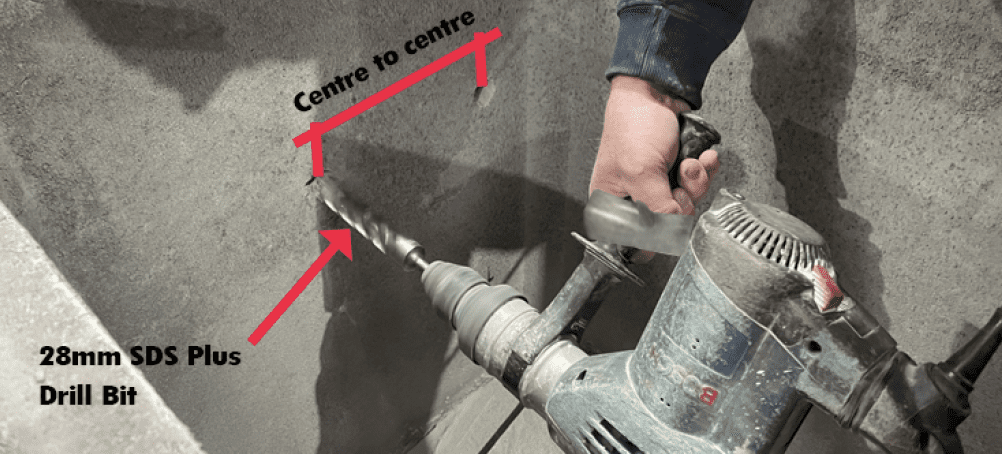
Mark and drill hole positions as per the step width above. Be careful to keep the drill perpendicular to the pit wall.
Pre-drill using a smaller SDS bit for increased accuracy.
Clean the dust from the hole before
proceeding to Step 3.
Apply a chemical bonding agent evenly to the step legs, such as Chemset.
Use a mallet to tap the step into holes; alternate the ends of the step with each knock. Only hit steps at each end, not in the middle.
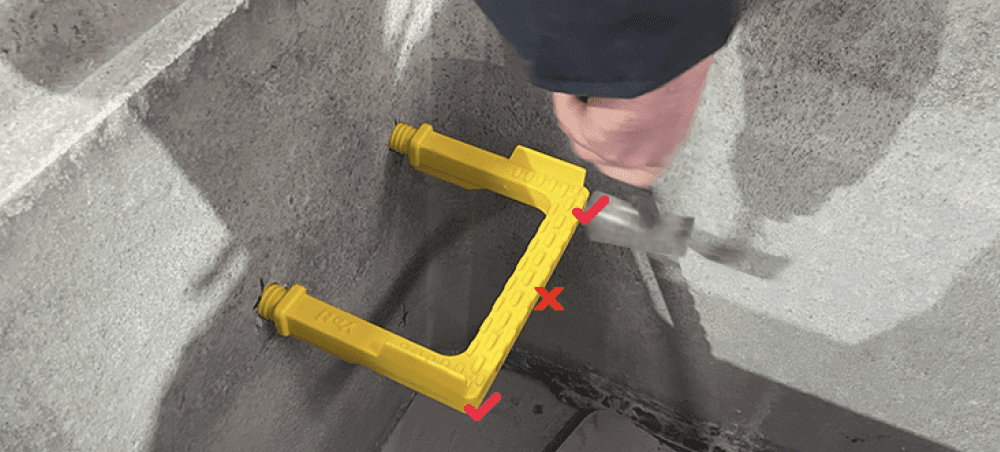

Once the stoppers on the legs of the Yeti steps come into contact with the wall the step is installed and ready to use.
*Although Yeti Steps have been factory tested to achieve a pull-out resistance of up to 500kg, with no chemical bonding added. A chemical bonding agent should be used, particularly if the integrity of the concrete or holes is questionable or a higher pull-out strength is required. The use of a chemical bonding agent will achieve up to 1,500kg pull-out resistance.
Yeti Steps are available in three sizes: WS225, WS285, and WS375, with centre-to-centre distances of 225mm, 285mm, and 375mm, respectively.
Required tools include a tape measure, marker, quality SDS Hammer Drill, 28mm SDS Plus 4 Cut Drill Bit, mallet and a chemical bonding agent such as Chemset.
By adding a chemical bonding agent during installation, Yeti Steps can achieve up to 1500kg pull-out resistance, especially recommended if the concrete’s integrity or the hole is questionable or higher pull-out strength is required.
The steps incorporate a centralised high tensile 16mm steel bar, a high-strength 28mm diameter step leg, and optimised slip resistance, all designed to meet and exceed AS standards.
Features include a stopper on the leg for installation to AS standards and high-strength step support for extra rigidity.
They have an optimised slip resistance pattern suitable for work boots, ensuring safety and durability in various environments.
Installers will notice a significant improvement in design and material quality compared to competitors, evident from the moment they handle a Yeti Step. Yeti Steps are designed for the installer; they are made to be robust and handle being knocked into position without affecting the structural integrity or performance of the steps.
Have a question or need advice?
The Ready Drain team is at your service. Just let us know if you have any questions.
info@readydrains.com.au